
How to Use the Quick Connect Automatic Tire Deflator
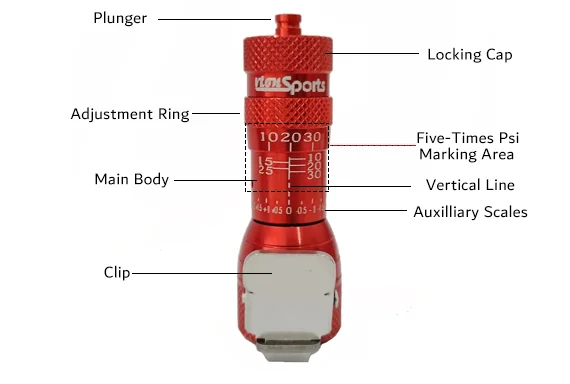
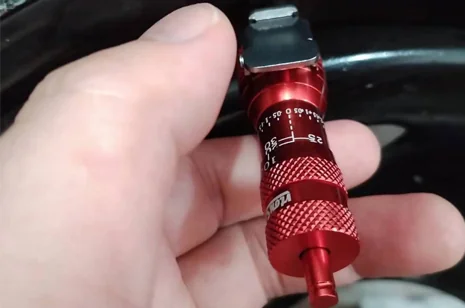
The Quick Connect deflator comes factory-set to 20 PSI and adjusts anywhere from 10 to 40 PSI by rotating the adjustment ring to line up with the markings on the main body.
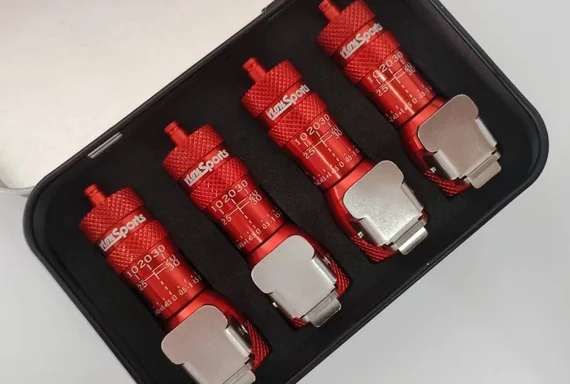
Pressure Adjustment Range
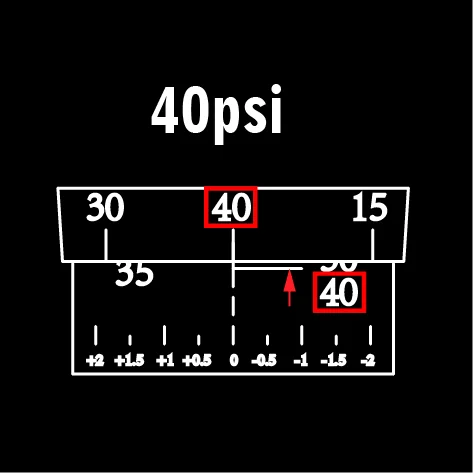
The deflator is factory-set to 20 PSI, and you can easily adjust it to 10, 15, 20, 25, 30, 35, or 40 PSI just by turning the adjustment ring to line up with the matching marking on the main body. The photos below show exactly where each of those five-PSI positions sits.
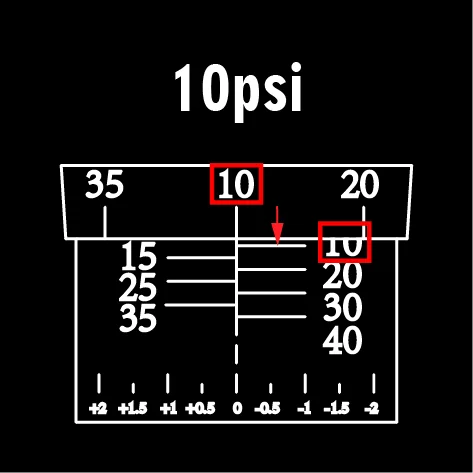
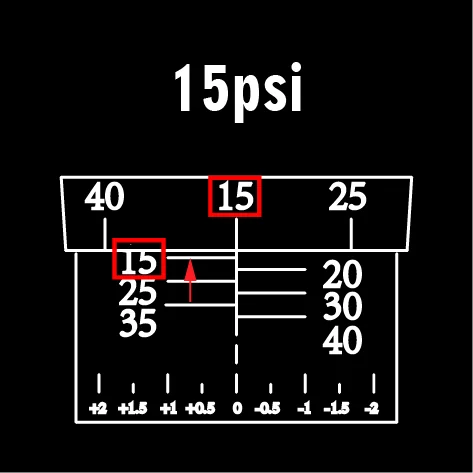
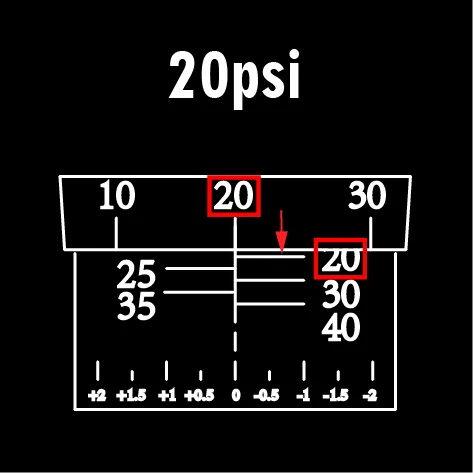
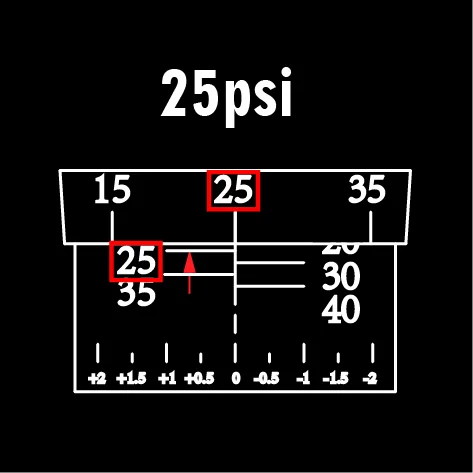
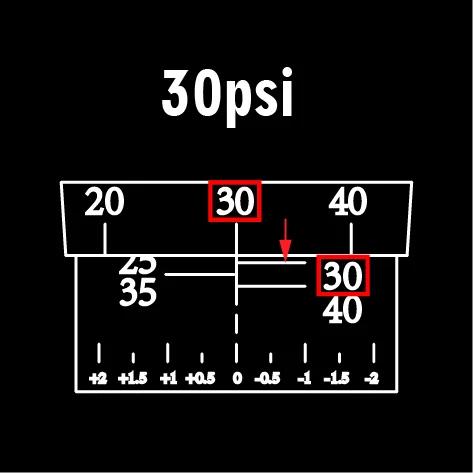
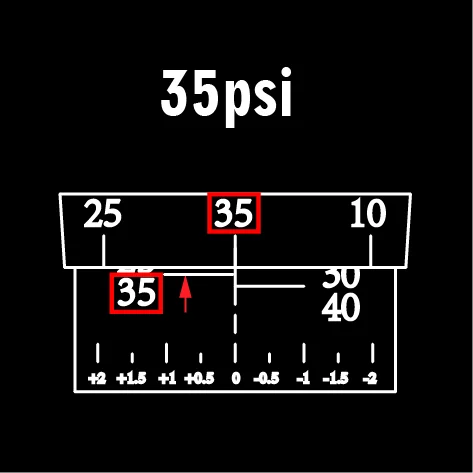
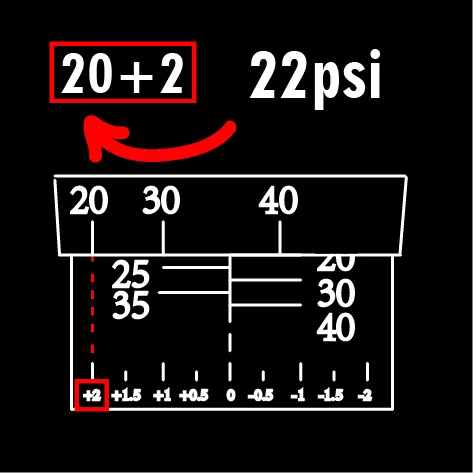
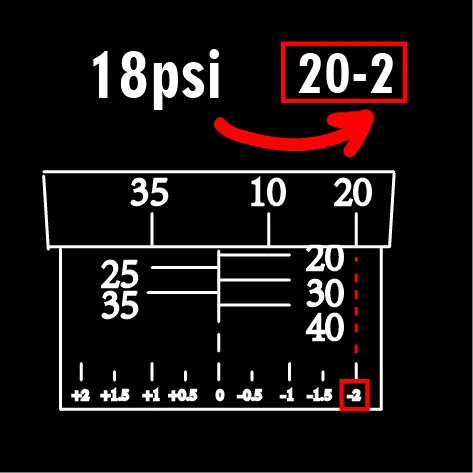
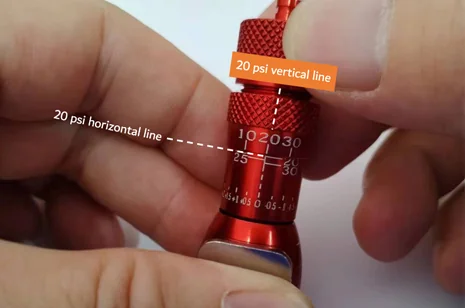
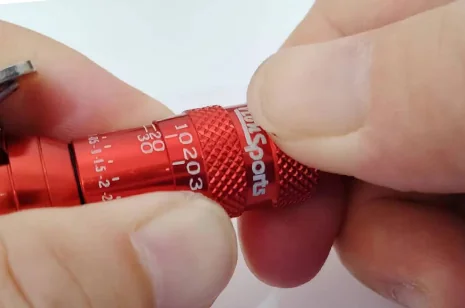
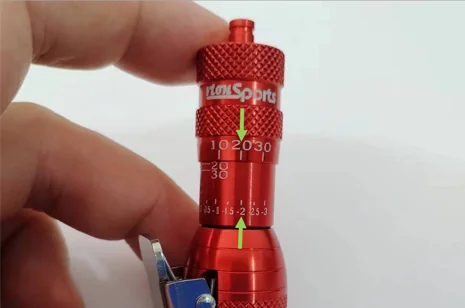
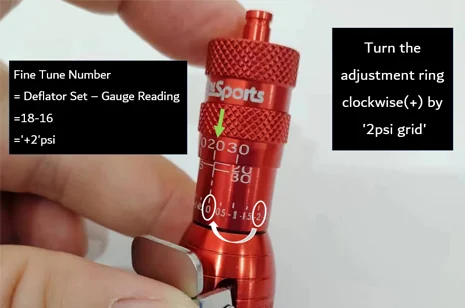
For a pressure that isn't a multiple of five - like 22, 21, 19, 18, 17, 16, 9, or 8 PSI - use the auxiliary scale lines instead. For example, to set 22 PSI: first turn the ring to the 20 PSI position, then keep turning it clockwise until the 20 PSI vertical line on the ring lines up with the '+2' mark on the auxiliary scale. The photos below walk through setting 22 PSI and 18 PSI this way.
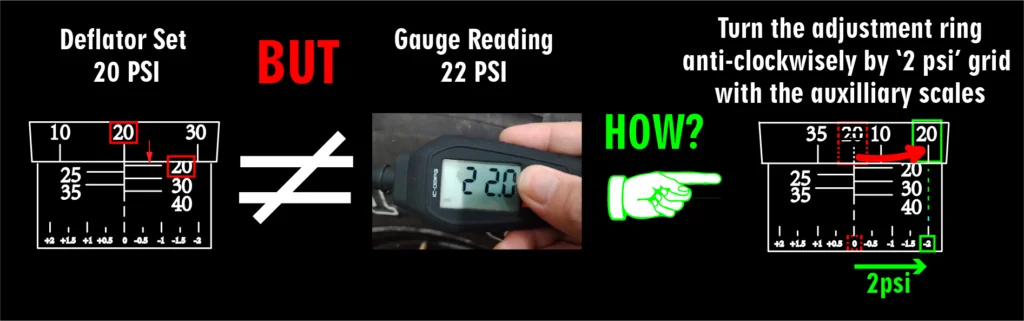
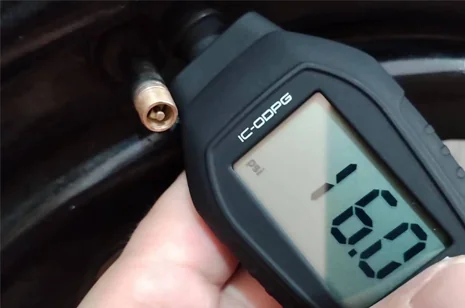
The auxiliary scale also lets you correct for any gap between the pressure you set and what you actually measure afterward. For example, if you set the deflator to 20 PSI but your gauge reads 22 PSI once the tire is deflated, turn the adjustment ring counterclockwise by one '2 PSI' grid on the auxiliary scale (i.e. -2 PSI) to bring it back in line. Remember: turning the ring clockwise raises the pressure, counterclockwise lowers it.
Step 1: Set Your Desired PSI
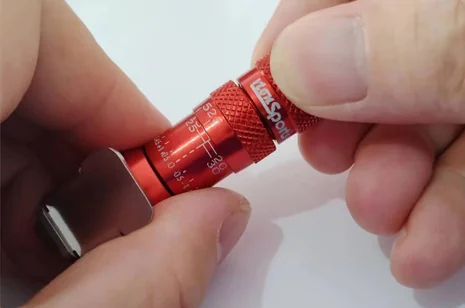
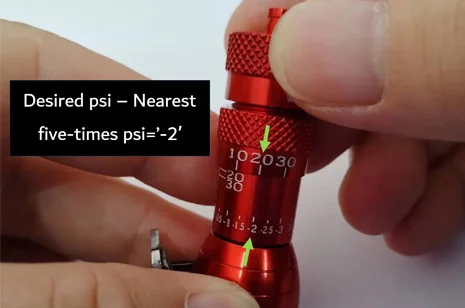
Start by turning the adjustment ring to the five-PSI marking closest to the pressure you actually want, then fine-tune from there using the '-' and '+' lines on the main body. For example, to deflate to 18 PSI: the nearest five-PSI marking is 20 PSI, and 18 is 2 PSI below that, so you'd align the 20 PSI vertical line on the adjustment ring with the '-2' line on the main body (desired PSI minus nearest five-PSI marking = the offset to dial in).
- Loosen the locking cap by turning it counterclockwise
- Turn the adjustment ring to the 20 PSI position first
- Align the 20 PSI vertical line on the adjustment ring with the '-2' line on the main body
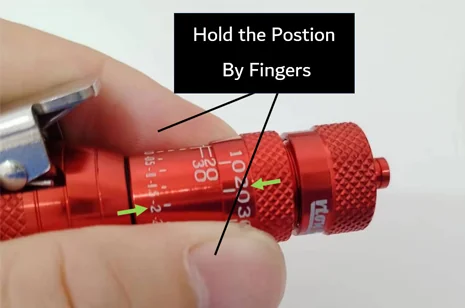
- Hold the adjustment ring and main body in place with your fingers
- Tighten the locking cap - make sure it's securely and firmly locked
- Double-check the setting is correct before use
Step 2: Clip Onto the Valve
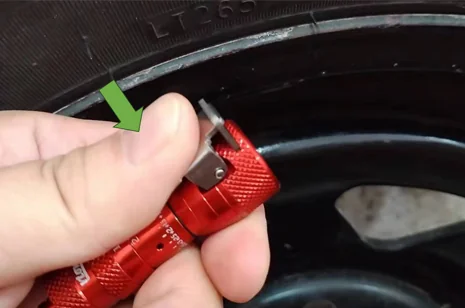
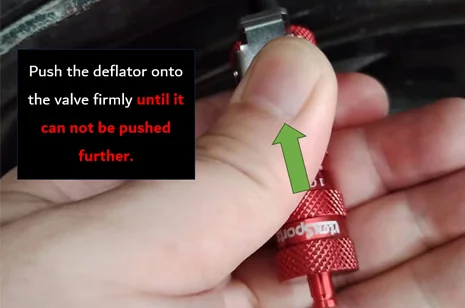
Press the clip to open the chuck, then push the deflator onto the valve firmly until it can't be pushed further. Release the clip to activate - the tire deflates automatically down to your preset pressure.
Step 3: Fine-Tune If Necessary
Check the result with a gauge. Turning the adjustment ring clockwise by one '2 psi' grid increases the target pressure; turning it counterclockwise decreases it.
Maintenance (Optional)
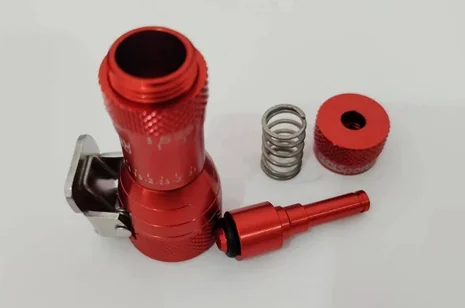
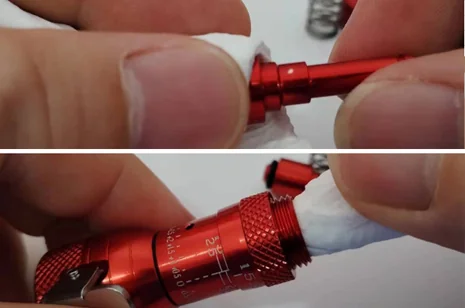
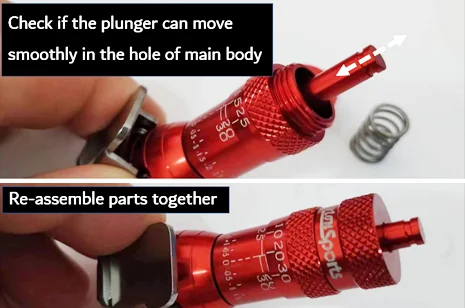
If a deflator loses accuracy or stops activating, the most likely cause is dust from the tire or valve stem jamming the plunger. According to customer feedback, this affects only about 0.01% of users, so maintenance is optional, not routine - using valve caps to keep dust out, and doing maintenance only as often as your conditions require, is usually enough. Screw off the locking cap, remove the plunger, and clean the plunger and the main body hole with soft, dry paper (or an air gun), then reassemble carefully, keeping each deflator's own parts together.
Important
Clip the deflator directly onto the valve stem. Any adapter or hose between the valve and the deflator can affect its accuracy.
Videos
The video below explains in detail how to set the tire pressure, how to fine-tune the pressure value, when maintenance is needed, how to perform maintenance, and the mistakes that may affect the final tire pressure.